Creating a Simple Blog Using Vue with Markdown
I'm not a 'natural' frontend developer, learning vue and re-learning Javascript with my Java knowledge came as a challenge. Not to mention all those bundlers, builders, like webpack, gulp, grunt and other weird noises that adds to the overall complexitiy of learning modern web frameworks. But if there's one thing that helped me in learning new technologies that is, to just jump right in and build little projects. Teaching is also a widely accepted technique that will greatly help you in learning. It doesn't mean that you have to gather a huge audience that will listen to you teach something. Sometimes, the audience you need is just yourself. Write what you've learn with the intention of teaching it to your old (or future) stupid self. It's kinda weird and paradoxical I know but just roll with me on this.
With that mind, exactly a year ago, I decided to add a blog section on my personal website just for fun. I just ported my previous portfolio to Vue and I was wondering what's the most simplest way to add blogging functionality to it. I know, some people will probably frown at the idea of using a frontend framework to develop a measly portfolio website in the first place. But if your goal is to really just getting yourself up and running with a framework, I'd argue that using it to build your portfolio website is a good start. It's a simple project that will really familiarize you with the basics and will give you enough motivation to complete it.
So that's what I did. This post tells the story of how I set on adding a blog functionality on my Vue portfolio website. My thought-process, decisions, approach and what-nots.
I know from the start that I want it to be really simple. I know ButterCMS is good and all but as much as possible I don't want to introduce that much complexity, it's just a simple personal website after all. What I really want is as straightforward as hard-coding and commiting a new webpage everytime I write a new post but still simple enough that I wouldn't worry about writing in an HTML markup. That's where markdown comes in. Markdown is a really popular lightweight markup language that just fits the bill.
It's decided then. At the center of it all, what I want to accomplish is just two things:
- Be able to write my blogs in markdown
- Vue must be able to display these markdows as a regular html page
Essentially, to accomplish both, I just have to figure out how Vue can interpret markdown. Now, I'm not an expert with webpack, heck when I built my website years ago, I don't even know how to configure webpack myself, I was putting that off in favor of learning whatever framework I was learning at the moment. But being exposed with it for some time, I was able to pick up some concepts and context of what it does. In this case, I know that what I need is a webpack loader that can interpret markdown. Much like how .vue files comes out fine after passing through webpack because of vue-loader.
Vue-Markdown-Loader
Literally the first thing I did after that realization was to google "vue markdown loader". And QingWei-Li's vue-markdown-loader repo comes back as the first result. The documentation is pretty straightforward, I added this code over at my vue.config.js:
module.exports = {
chainWebpack(config){
config.module.rule('md')
.test(/\.md/)
.use('vue-loader')
.loader('vue-loader')
.end()
.use('vue-markdown-loader')
.loader('vue-markdown-loader/lib/markdown-compiler')
.options({
raw: true
})
}
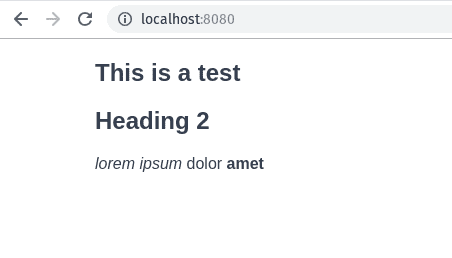
}Like how vue-loader makes .vue files possible, vue-markdown-loader makes .md work within Vue. In essence, markdowns can now be interpreted as a Vue component. To test this, within my components/ directory, I created the following foo.md:
# This is a test
## Heading 2
_lorem ipsum_ dolor __amet__
Imported it as a component on App.vue and used it within the template.
<template>
  <div id="app">
    <foo />
    ...
  </div>
</template>
<script>
  import Foo from '@/components/foo.md'
  export default {
    components: { Foo },
    ...
  }
</script>
Doing a quick yarn serve and visiting localhost, viola! It works!
At this point, we've verified that our Vue project can now understand and render markdown. We can now write our blogs in .md and just reference them wherever we like. And since it's a component there's nothing stopping us from using it as a route component, say in our router.js:
import Vue from 'vue'
import Router from 'vue-router'
import Home from './views/Home.vue'
import Foo from './components/foo.md'

Vue.use(Router)

export default new Router({
  mode: 'history',
  base: process.env.BASE_URL,
  routes: [
    { path: '/', name: 'home', component: Home },
    { path: '/foo', name: 'foo', component: Foo }
  ]
})
Now everytime we visit /foo it will render the markdown contents of our foo.md. Pretty neat, right? This works but wouldn't it be better if we could simplify the process of adding a new post a bit? We could create a separate file and put all blog entries in there, and that's the file that we update whenever we have a new blog post — good ol' indirection.
[
  "foo",
  "another-post",
]
We'll have to change the way we register our route components a bit. We'll have to build those routes programmatically and make use of dynamic component registration using dynamic imports:
import Vue from 'vue'
import Router from 'vue-router'
import Home from './views/Home.vue'
import Blogs from './statics/blogs.json'

Vue.use(Router)

export default new Router({
  mode: 'history',
  base: process.env.BASE_URL,
  routes: [
    { path: '/', name: 'home', component: Home },
    ...Blogs.map(entry => ({
      path: `/${entry}`,
      name: entry,
      component: () => import(`./markdowns/${entry}.md`)
    }))
  ]
})
Notice in the above code, we are assigning the markdown filename to both path and name. And for better structure, we're placing all our markdowns inside it's own directory. In this setup, we'll never have to mess with router.js again whenever we add a new blog post. Now, the only thing left to do is to create actual links that will point to them.
Putting it all together
Using what we've learned, I've put things together and created a working demo on this link. You can also check out the code in this repository. There our some minor changes compared to our previous experiments.
First, let's look at the directory structure:

Notice that I've created subdirectories 2019 and stories which refers to different sections of the blog. This changes how we structure our routes a little but will greatly improve our overall UI.
Looking at statics/data/blogs.json:
{
  "2019": [
    {
      "id": "vue-markdown-blog",
      "date": "March 10, 2019",
      "title": "Creating a Simple Blog using Vue + Markdown",
      "description": "Simple and neat way to add a blogging feature to add on your website."
    }
  ],
  "stories": [
    {
      "id": "maud-sparrow",
      "date": "April 21, 2018",
      "title": "Maud Sparrow and the Four Wicked Horses",
      "description": "Once upon a time there was a generous girl called Maud Sparrow. She was on the way to see her Albert Connor, when she decided to take a short cut through Spittleton Woods..."
    },
    {
      "id": "nico-borbaki",
      "date": "May 5, 2018",
      "title": "Nefarious Nico Borbaki",
      "description": "Nico Borbaki looked at the enchanted newspaper in his hands and felt conflicted..."
    },
    {
      "id": "jack-butterscotch",
      "date": "June 10, 2018",
      "title": "Jack Butterscotch | The Dragon",
      "description": "In a hole there lived a tender, silver dragon named Jack Butterscotch. Not an enchanted red, stripy hole, filled with flamingos and a cold smell, nor yet a short, hairy, skinny hole with nothing in it to sit down on or to eat: it was a dragon-hole, and that means happiness..."
    },
    {
      "id": "tiny-arrow-wars",
      "date": "July 27, 2018",
      "title": "Galactic Tiny Arrow Wars",
      "description": "A long, long time ago in a tiny, tiny galaxy..."
    },
    {
      "id": "gargoyle-club",
      "date": "August 7, 2018",
      "title": "Club of Gargoyle",
      "description": "Molly Thornhill suspected something was a little off when her creepy daddy tried to club her when she was just six years old. Nevertheless, she lived a relatively normal life among other humans."
    },
    {
      "id": "simon-plumb",
      "date": "September 20, 2018",
      "title": "Simon Plumb and the Two Kind Gerbils",
      "description": "Once upon a time there was a virtuous boy called Simon Plumb. He was on the way to see his Annie Superhalk, when he decided to take a short cut through Thetford Forest..."
    }
  ]
}
Instead of an array of strings, I've converted it to an object. Each key refers to the blog section which also matches its subdirectory. The object array under each key refers to the actual blog entry. There are bunch of additional properties like date that we'll use in the UI but the important bit is the id which refers to the actual markdown component.
(Also, you can put everything in a js file instead of json. It's a matter of personal preference. Putting it in a js file will probably make your production build much smaller after webpack does it thing. But saving it in a json file under statics will act as a simple REST endpoint where I can issue GET requests from, which is useful if I end up integrating it to some other UI in the future.)
I've implemented all those additional changes to be able to display a UI like this:
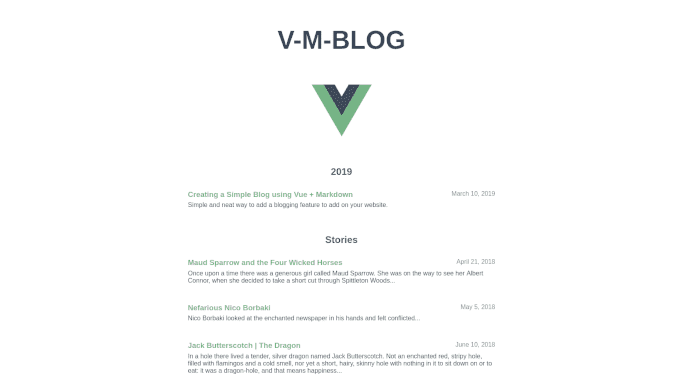
The last thing we need to do is to adjust router.js. What it does is basically just map those blog sections into route objects. Entries under each section becomes the child of their respective route object. Basically, we'll be able to visit our blog entries using paths in this format: ${section}/${blog entry}, eg: 2019/vue-markdown-blog.
import Vue from 'vue'
import Router from 'vue-router'
import Home from './views/Home.vue'

Vue.use(Router)

import BlogEntries from './statics/data/blogs.json';

const blogRoutes = Object.keys(BlogEntries).map(section => {
  const children = BlogEntries[section].map(child => ({
    path: child.id,
    name: child.id,
    component: () => import(`./markdowns/${section}/${child.id}.md`)
  }))
  return {
    path: `/${section}`,
    name: section,
    component: () => import('./views/Blog.vue'),
    children
  }
})

export default new Router({
  mode: 'history',
  base: process.env.BASE_URL,
  routes: [
    {
      path: '/',
      name: 'home',
      component: Home
    },
    ...blogRoutes
  ]
})
This setup introduces another key improvement to our blog: messing with the styling. Notice that Blog.vue acts as a wrapper layout component of our blog entries. It contains the following code:
<template>
<div class="blog">
<router-view />
<router-link to="/" tag="a" class="back">« Back</router-link>
</div>
</template>Styling
We now have the opportunity to style the rendered markdown however we like. The key here is to target what will eventually be displayed inside <router-view /> using a /deep/ selector. See the following:
<template>
<div class="blog">
<router-view />
<router-link to="/" tag="a" class="back">« Back</router-link>
</div>
</template>
<style lang="scss" scoped>
.blog {
max-width: 50vw;
margin: 10rem auto;
/deep/ {
h1 {
font-size: 3rem;
margin-bottom: .2rem;
color: #42b883;
}
h4 {
margin-bottom: 3rem;
color: #35495e;
}
}
}
</style>Check out markedstyle.com for more markdown styling ideas. You can even import an external markdown style just don't forget to wrap it properly within a .blog /deep/ selector. ie:
/** external style **/
.blog /deep/ {
 /** paste external markdown style here **/
}
Bit of a warning though, as much as possible one should avoid using /deep/ because it somehow defeats the purpose of scoped and it's been deprecated by Chrome. Vue-loader just still supports it, that's why it works. But I'd argue that this is one those cases where it's useful. We don't want to pollute the global css scope so we'd like to contain styling within Blog.vue's children so we use scoped and /deep/ together. (Although, if someone more knowledgeable has a better solution for this I'll gladly take it.)
And that's it! A simple blogging feature for your website without using any other 3rd-party service. Just plain and simple vue.
Further Improvements
If you want to take it a step further, you can add page metas using all those additional fields inside blog entries, date, title, description, etc. This would play nicely if you've implemented some sort of social sharing as well.